

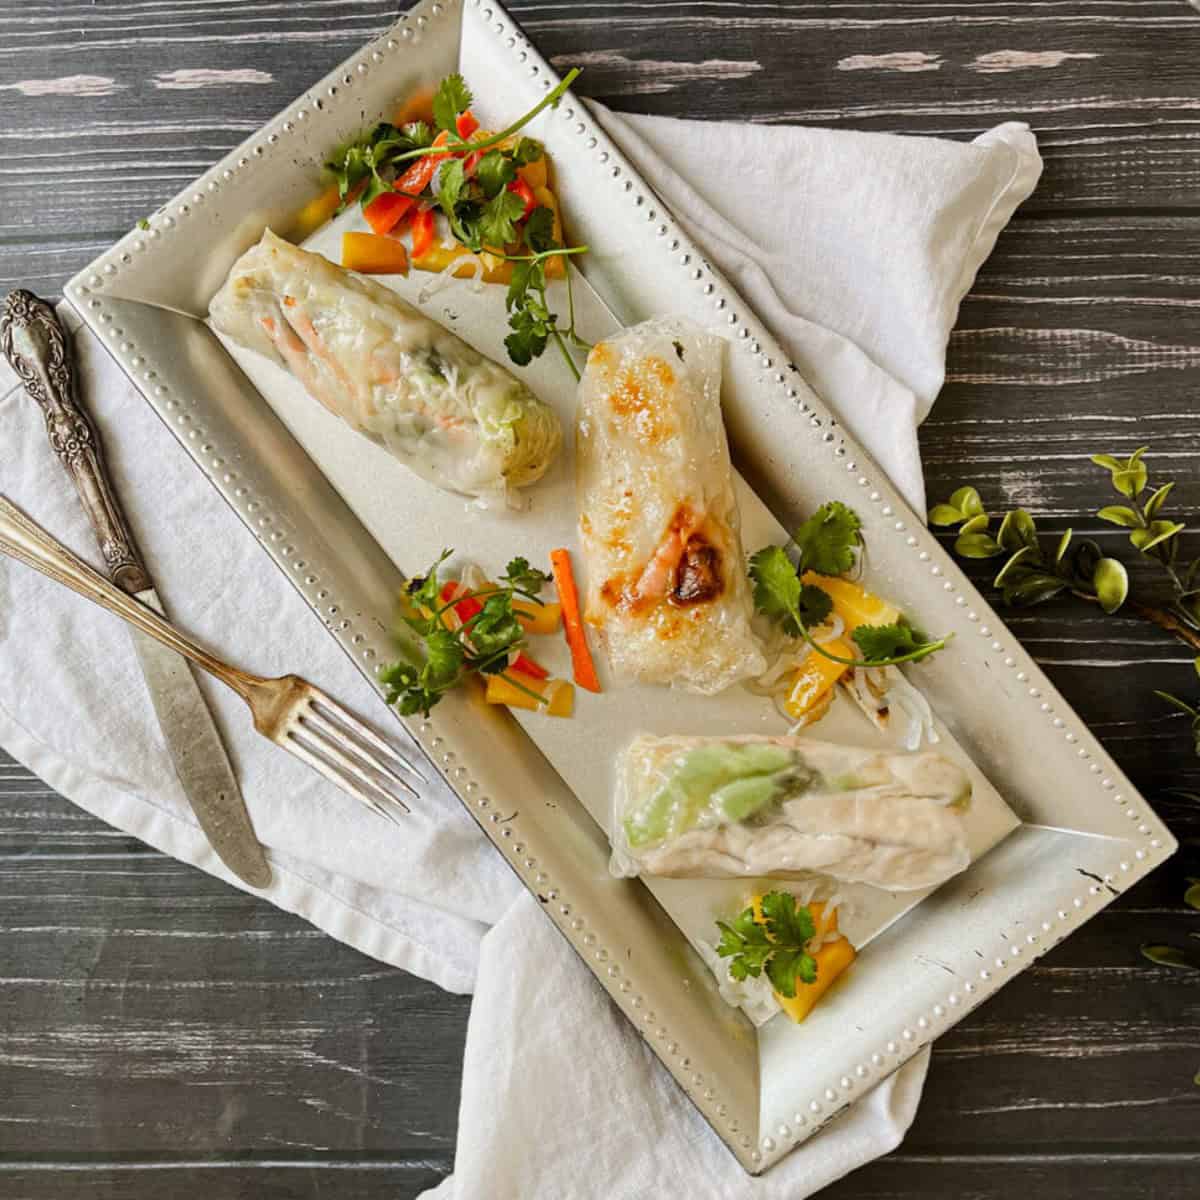
You have got to try these delicious gluten free mango avocado crispy spring rolls! One, because it's FINALLY spring. We’re enjoying mango avocado spring rolls today with shirataki or vermicelli noodles, lettuce, mango, avocado, chicken and cilantro all wrapped up in one delicious spring roll. Spring and warm weather are here, let’s celebrate!
What are crispy spring rolls?
Spring rolls are a beloved dish worldwide, offering endless opportunities for creativity. Today, we’re diving into the vibrant flavors of mango and avocado, wrapped in a crispy shell. Whether you’re planning a dinner party, need a quick appetizer, or want to indulge in something new, these mango avocado crispy spring rolls are a must-try.
Ingredients
The ingredient list is simple for this recipe. You will need:
- Mango
- Avocado
- Spring roll wrappers
- Fresh herbs (such as cilantro or mint), roughly chopped
- Shirataki or vermicelli noodles
Instructions
- Peel and thinly slice the mango and avocado into even strips.
- Cook the shirataki or vermicelli noodles according to the package instructions. Drain well and set aside to cool.
- Wash and roughly chop the fresh herbs
- Fill a shallow dish with warm water and dip one spring roll wrapper in it for a few seconds until it softens.
- Place the softened wrapper on a clean, flat surface.
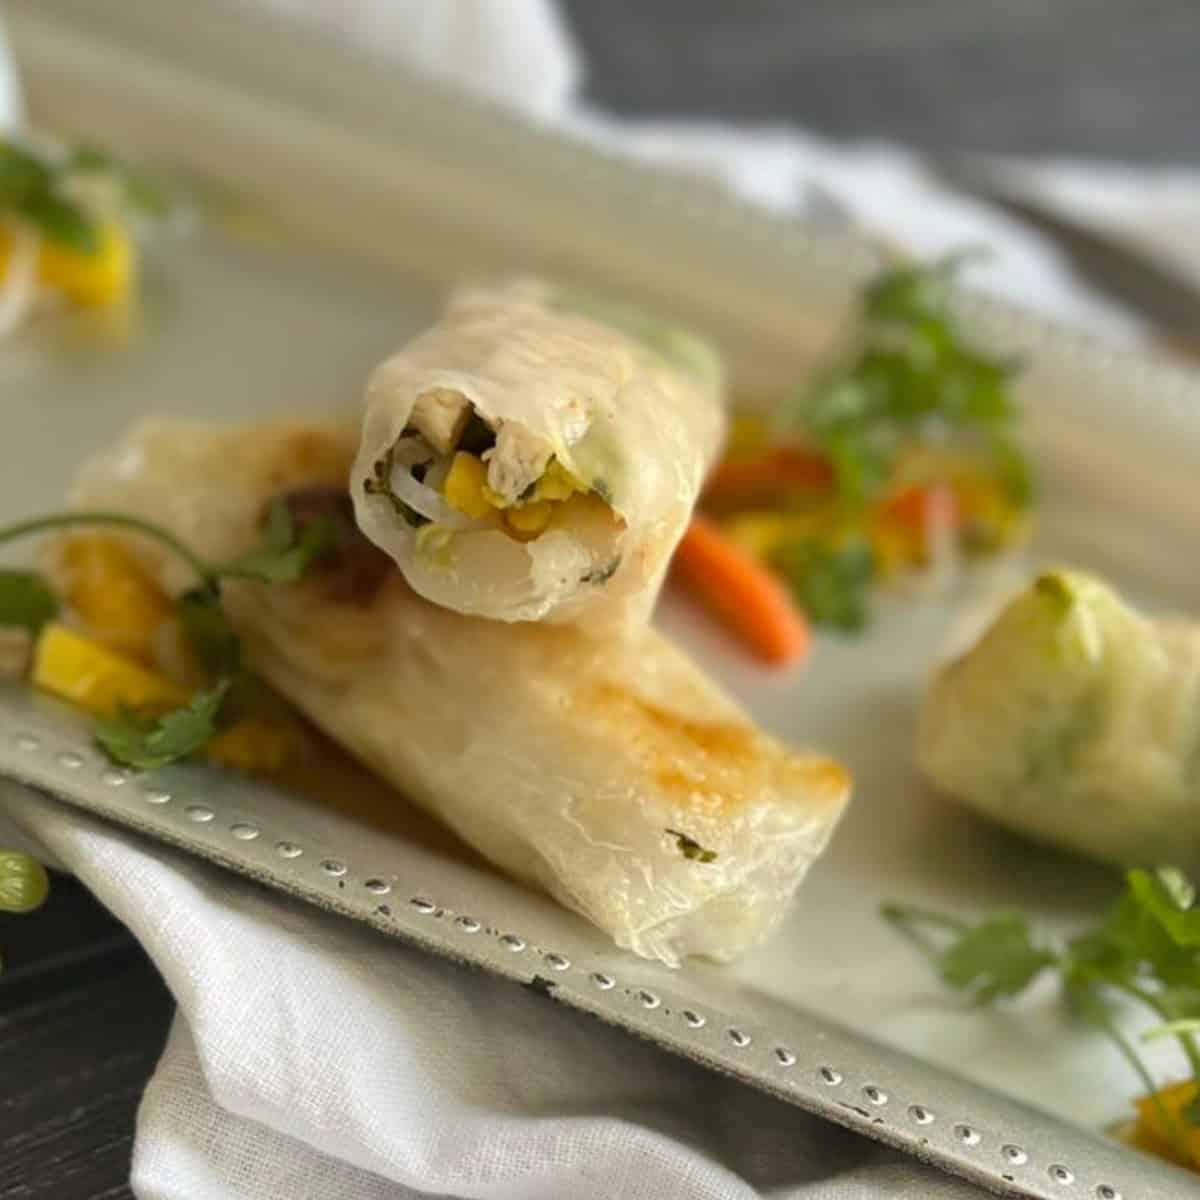
- Layer a small handful of noodles, a few slices of mango and avocado, and a sprinkle of fresh herbs in the center of the wrapper.
- Fold the sides of the wrapper inward, then roll it tightly from the bottom up, ensuring the filling is secure.
- Repeat the process with the remaining wrappers and fillin
- Pair your spring rolls with a dipping sauce like peanut, soy-lime, or sweet chili for an extra layer of flavor.
Substitutions
This recipe is gluten free as long as you use gluten free soy sauce. This recipe is naturally vegan, vegetarian, and dairy free.
Tips
- Use Fresh Ingredients: Opt for ripe but firm mango and avocado to ensure the rolls hold their shape.
- Soften the Wrappers Properly: Avoid over-soaking the wrappers, as they can become too fragile to handle.
- Keep It Tight: Roll each spring roll snugly to prevent the filling from spilling out.
- Add Protein: Include cooked shrimp, tofu, or shredded chicken for a more filling option.
- Extra Veggies: Add julienned carrots, cucumber, or bell peppers for a colorful crunch.
- Swap the Noodles: Try rice noodles or skip the noodles altogether for a lower-carb version.
Storing
These crispy spring rolls can be made a day or two in advance, but should be served fresh. The ingredients are just better if served fresh.
FAQ
Yes! You can assemble the spring rolls a few hours ahead of time. Cover them with a damp towel and refrigerate until ready to serve.
Sweet chili, peanut, hoisin, or soy-lime dipping sauces all complement the flavors beautifully.
We usually soak each spring roll for about 15-20 seconds in water then place it on top of a wet paper towel, a cutting board or countertop. We usually fill a pie dish or plate with water. Don’t stress, the spring roll wrapper will still fill a little firm but will soften as it sits. We fill the spring roll up with fillings and then wrap it all up! The spring roll wrappers will get sticky so make sure to not have them touch each other!
Freezing is not recommended as the fresh mango, avocado, and herbs can lose their texture when thawed.
It happens sometimes! But the good thing is you can bring them back to their pliable shape. Just dip the rolls quickly in water and then wipe off the excess. Cover them with a wet paper towel for 1-3 minutes until they soften again. Eat and enjoy or continue with one of the above cooking methods.
Cooking Crispy Spring Rolls
There are several ways to cook rice spring rolls:
- No cook. You can serve your spring rolls right away if you would like without cooking as long as any meat you are using has been cooked or prepared properly.
- Frying: Place oil in a pan and heat to approximately 375 degrees. Place one roll in the oil and allow the roll to brown (about 5-10 seconds). Flip the roll and brown the other side (5-10 seconds). Remove and allow to drain on paper towels.
- Oven: Preheat oven to 350 degrees. Line a baking sheet with parchment paper or lightly greased tin foil. Arrange the spring rolls on the pan, not touching each other. Bake at 350 degrees for 20 minutes, flipping half way through baking time. Spring rolls are done when nicely browned on each side. **Favorite baking method for cooked spring rolls
- Air Fryer: Brush each spring roll lightly with oil and lightly grease the inside of your air fryer. Cook rolls for approximately five minutes, turning and flipping them over and cooking for an additional five minutes more until browned.

Mango Avocado Crispy Spring Rolls
Ingredients
- 1 ripe mango peeled and thinly sliced
- 1 ripe avocado peeled, pitted, and thinly sliced
- 10 spring roll wrappers
- Fresh herbs such as cilantro or mint, roughly chopped
- 1 cup cooked shirataki or vermicelli noodles drained and cooled
Instructions
- Peel and thinly slice the mango and avocado into even strips.
- Cook the shirataki or vermicelli noodles according to the package instructions. Drain well and set aside to cool.
- Wash and roughly chop the fresh herbs.
- Fill a shallow dish with warm water and dip one spring roll wrapper in it for a few seconds until it softens.
- Place the softened wrapper on a clean, flat surface.
- Layer a small handful of noodles, a few slices of mango and avocado, and a sprinkle of fresh herbs in the center of the wrapper.
- Fold the sides of the wrapper inward, then roll it tightly from the bottom up, ensuring the filling is secure.
- Repeat the process with the remaining wrappers and filling.
- Pair your spring rolls with a dipping sauce like peanut, soy-lime, or sweet chili for an extra layer of flavor.
Nutrition
Post contains affiliate links
Leave a Reply