

These copycat Kinder eggs are chocolate surprise eggs made of a chocolate shell that contains a small toys, candy or prizes inside. While Kinder eggs may not be readily available in all countries, you can make your own homemade version that is just as delicious and fun to open. And you can even make it dairy free!
Jump to:
Ingredients
This delightful treat combines smooth milk chocolate with a hidden surprise nestled inside each egg. For these treats you will need:
- Melted chocolate
- Silicone or chocolate molds
- Small toys or candy
Instructions
Making your chocolate surprise eggs is pretty simple but you will want to really read through the instructions for tips:
Step 1: Melting the Chocolate
Begin by melting the milk chocolate in a heatproof bowl over a pot of simmering water or using a microwave. Stir the chocolate until it's smooth and fully melted.
Step 2: Coating the Mold
Brush the inside of the plastic or silicone egg mold with a layer of melted chocolate. Ensure that the entire surface is coated evenly, creating a thin shell. Place the coated mold in the refrigerator for about 10 minutes to set.
Step 3: Building the Layers
Repeat the coating process to build up the chocolate layers, ensuring the shell is thick enough to hold its shape. Chill the mold in the refrigerator between each coating until you achieve the desired thickness.
Step 4: Assembling the Chocolate Egg
Once the chocolate shell is sturdy and set, carefully remove it from the mold. Gently press the edges of the two halves together, creating a complete egg shape. If needed, use a bit of melted chocolate to seal any gaps.
Step 5: Decorating (Optional)
Melt white chocolate and drizzle or create decorative patterns on the surface of the chocolate egg for an extra touch of visual appeal. Allow the decoration to set before proceeding.
Placing the Toys Inside Each Egg
Step 1: Choosing the Surprise
Select small items that will fit inside the chocolate egg and ensure that the surprises are wrapped or enclosed in a safe, food-grade material.
Step 2: Placing the Surprise
Once the chocolate egg halves are assembled, carefully place the chosen surprise inside one half of the egg. Be mindful not to overfill and leave enough space for the chocolate to seal properly.
Step 3: Sealing the Egg
Apply a thin layer of melted chocolate around the edge of one half of the egg and press the two halves together, sealing the surprise inside. Wipe away any excess chocolate to maintain a clean appearance.
Variations
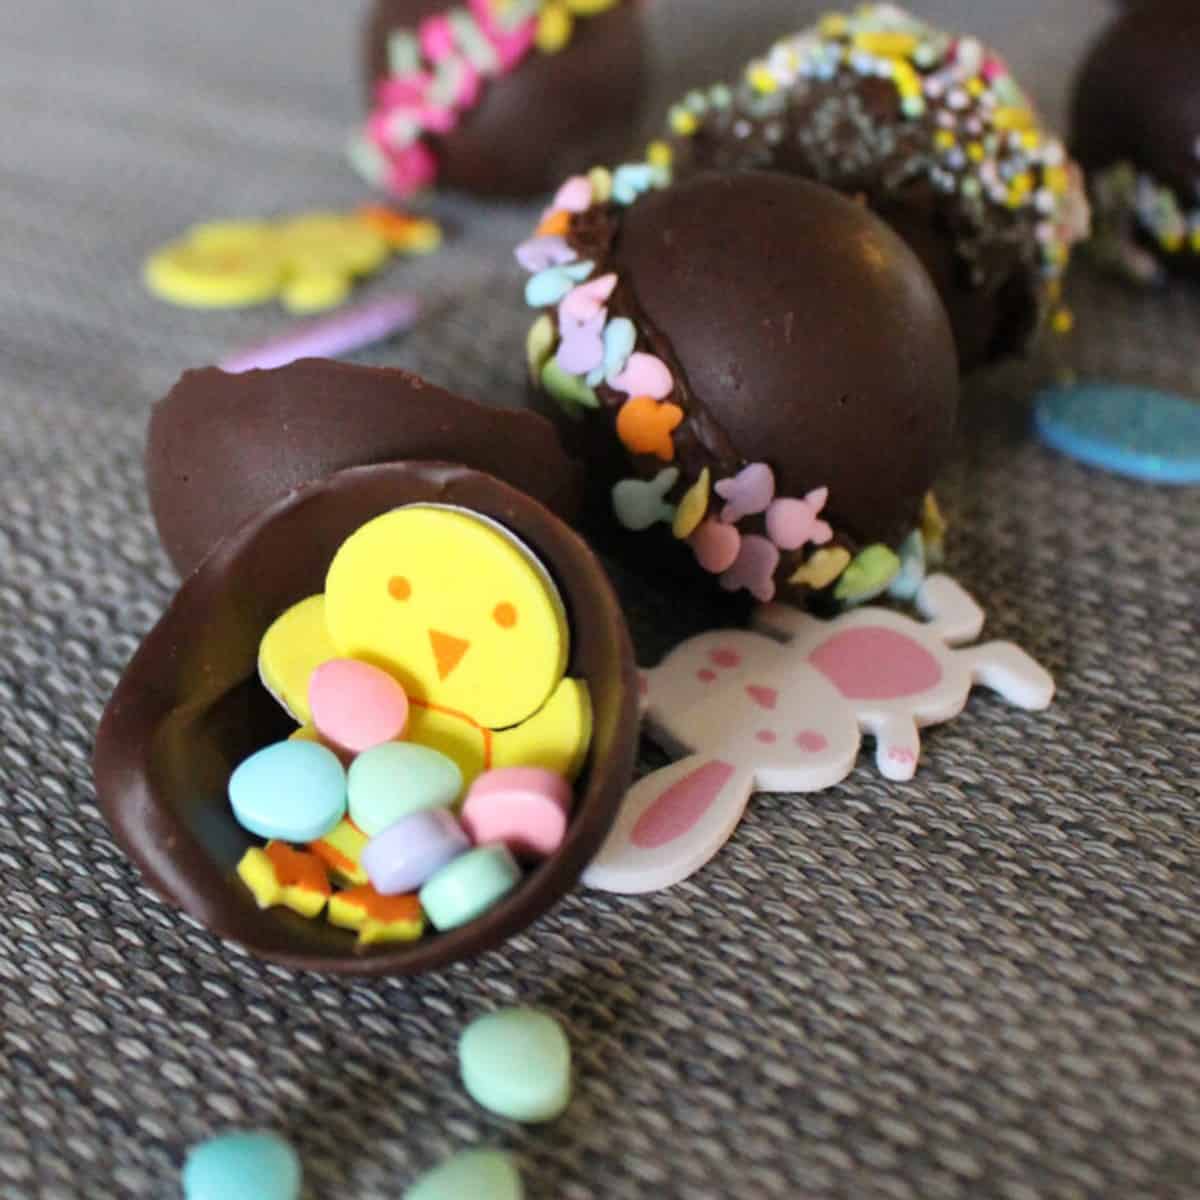
This is an easy recipe to adapt for birthday parties, holidays and more! The ones we pictured here were made for Easter. You can also use different mold shapes too like these chocolate softballs.
Substitutions
You can make these vegan and dairy free if you would like! Just use dairy free chocolate chips.
FAQ
Absolutely! Feel free to experiment with dark or white chocolate for a unique twist on the classic Kinder Chocolate Surprise Egg.
You can use plastic or silicone egg molds, readily available in baking supply stores. Ensure they are food-safe and suitable for chocolate molding.
Certainly! Tailor the surprises to the preferences of the person receiving the egg. You can include miniature toys, candies, or even personalized messages.
Store the wrapped chocolate eggs in a cool, dry place for up to a few weeks. Avoid exposure to direct sunlight or heat to prevent melting.
Absolutely! These homemade chocolate surprise eggs make delightful gifts and can be prepared in advance for special occasions or celebrations.
Yes, feel free to unleash your creativity. You can use different colors of chocolate, add sprinkles, or even create intricate patterns to make each egg unique.
Certainly! You can include notes, small puzzles, or even tiny DIY craft projects as surprises inside the eggs.
Absolutely! Scale up the recipe and assembly process to create a batch of copycat Kinder chocolate surprise eggs for special events or parties.

Copycat Kinder Chocolate Surprise Eggs
Equipment
- silicone or plastic molds
Ingredients
- 1 cup milk or semi sweet chocolate chips
- ¼ cup white chocolate chips optional
- small toys or prizes to fit inside the eggs
Instructions
- Begin by melting the milk chocolate chips in a double boiler or in the microwave. If using a microwave, heat in 30-second intervals, stirring between each interval, until the chocolate is fully melted and smooth.
- Once the chocolate is melted, pour a small amount into one half of a plastic Easter egg mold, filling it about one-third of the way. Use a small pastry brush to spread the chocolate evenly around the inside of the mold, making sure to coat the sides completely. Repeat with the other half of the mold.
- Once both halves of the mold are coated in chocolate, place them in the refrigerator to harden for about 10 minutes.While the chocolate is hardening, gather your small toys or prizes. Make sure they are clean and dry before placing them in the chocolate eggs.
- After the chocolate has hardened, remove the mold from the refrigerator and place a small toy or prize in one half of the mold. Make sure to leave enough space around the toy so that you can pour more chocolate on top.
- Once the toy is in place, reheat the chocolate if necessary and pour it over the toy, filling the mold about two-thirds of the way. Use a small pastry brush to spread the chocolate evenly around the toy, making sure to cover it completely. Repeat this process with the other half of the mold.
- Once both halves are filled with chocolate and toys, place them back in the refrigerator to harden for about 15-20 minutes.While the chocolate is hardening, melt the white chocolate chips in a double boiler or in the microwave. If using a microwave, heat in 30-second intervals, stirring between each interval, until the chocolate is fully melted and smooth.
- Once the chocolate is hardened, remove the mold from the refrigerator and carefully remove the chocolate eggs from the mold by gently pressing on the sides of the mold. They should easily pop out.Using a small amount of the melted white chocolate, attach the two halves of the egg together. Be careful not to use too much white chocolate or it will be visible on the outside of the egg.
- Once the eggs are sealed, use the remaining white chocolate to decorate the outside of the eggs as desired.Place the finished chocolate surprise eggs in the refrigerator to set and enjoy once the chocolate has hardened.
Leave a Reply