• Skip to primary navigation
  • Skip to main content
  • Skip to primary sidebar
Burnt Apple
  • About
  • Recipes
    • Amazon
    • Facebook
    • Instagram
    • Pinterest
menu icon
go to homepage
search icon
Homepage link
  • About
  • Recipes
    • Amazon
    • Facebook
    • Instagram
    • Pinterest
  • ×
    Home » party

    Softball Chocolate Pinata

    Published: Apr 18, 2022 · Modified: Jan 11, 2025 by burntapple · This post may contain affiliate links · Leave a Comment

    Jump to Recipe Print Recipe

    Chocolate piñatas are show-stopping treats that add fun and flair to any celebration. Whether you’re hosting a birthday party, a holiday gathering, or just want to create a memorable dessert, a chocolate piñata filled with candies, fruits, or other surprises is the perfect choice.

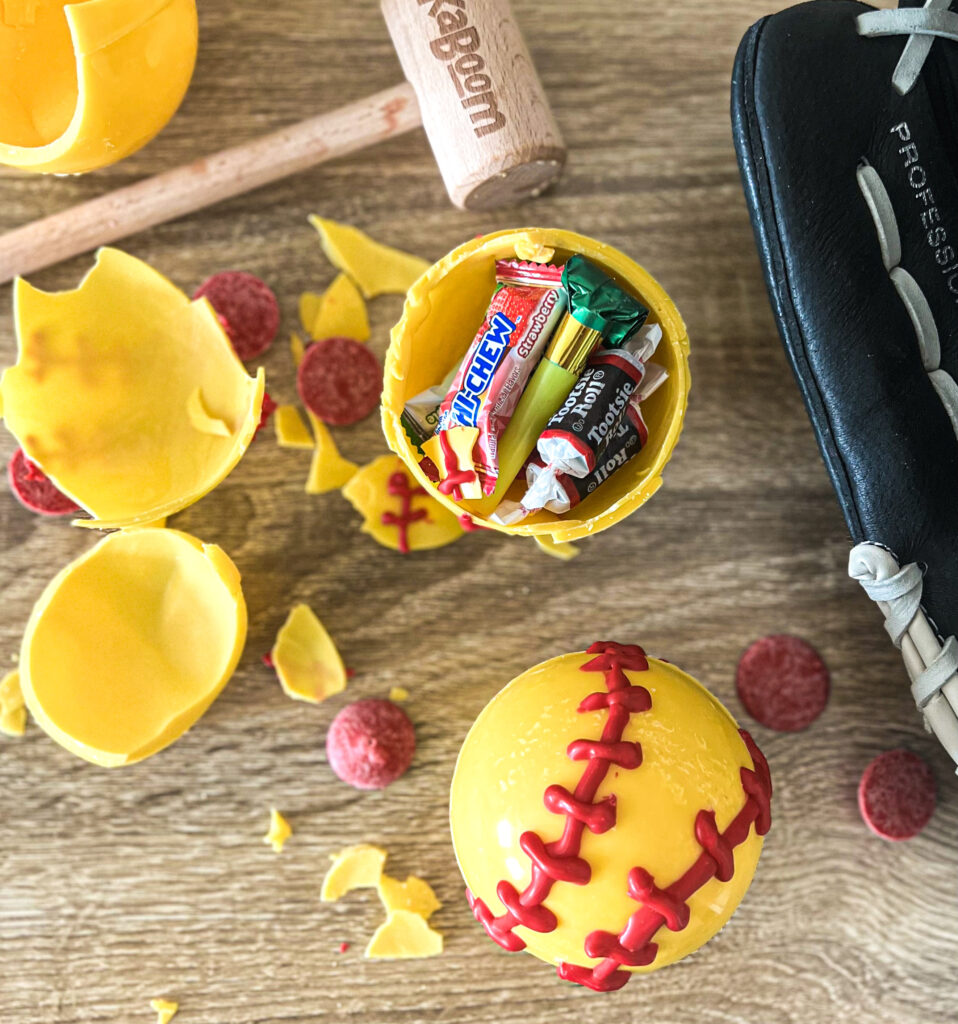
    A baseball or softball themed candy-filled egg. It is also known as a chocolate pinata. The egg is cracked open, revealing a variety of candies inside, including Tootsie Rolls, Blow Pops, and Mike and Ike. A wooden mallet is lying next to the egg, along with a baseball glove. There are also some red and yellow candy pieces scattered around.

    What is a chocolate pinata?

    These delicious treats are chocolate candy filled eggs. The shaped chocolate molds can be found at your local online, hobby, craft or specialty stores. To make a softball chocolate pinata like the one pictured, you will want to use a mini chocolate ball pinata mold.

    If these are a little too big for your liking, you can also try a smaller version with these chocolate surprise eggs.

    Jump to:
    • What is a chocolate pinata?
    • Ingredients
    • Instructions
    • Serving
    • Substitutions
    • Storing Prepared Chocolate Pinatas
    • Tips
    • FAQ
    • DIY Chocolate Pinata
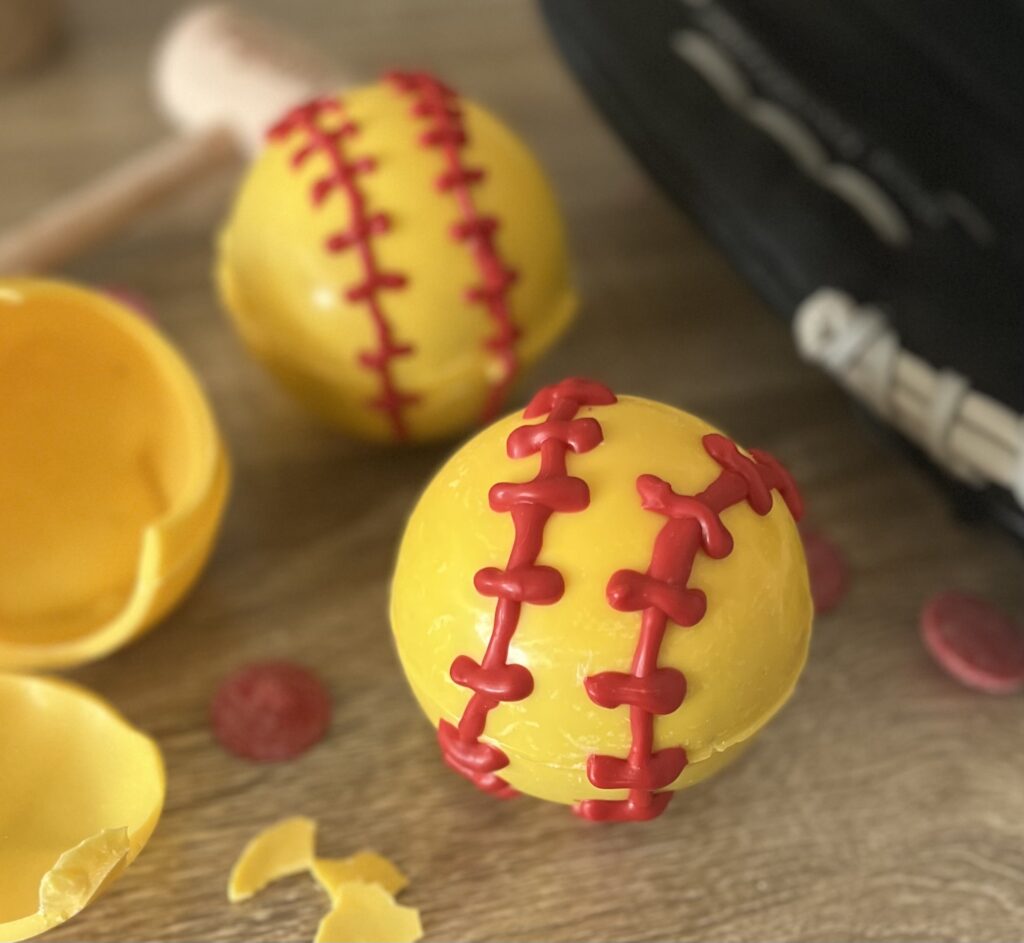
    Two yellow chocolate eggs decorated to look like baseballs or softballs. The eggs are on a wooden surface with red candy pieces scattered around. One egg is cracked open, revealing a hollow interior. A wooden mallet is visible in the background.

    Ingredients

    To make a chocolate pinata, you will need:

    • Mini ball chocolate mold, Kaboom offers pre-made chocolate piñata molds for easy shaping.
    • Chocolate melts
    • Small toys, candy, fruit or nuts, for filling

    Optional:

    • Parchment Paper or Silicone Mat: For mess-free preparation.
    • Spatula or Pastry Brush: To spread the chocolate evenly.
    • Knife or Scissors: For trimming edges.
    • Decorative Items: Sprinkles, edible glitter, or frosting for decoration.
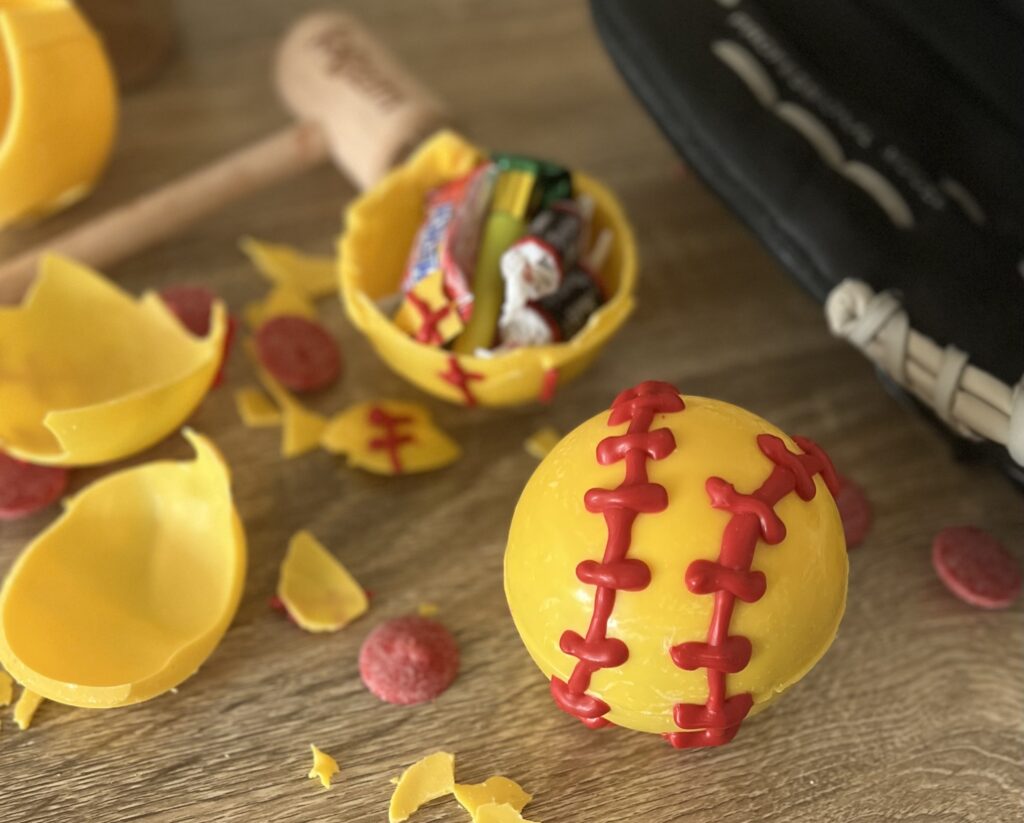
    Two yellow chocolate pinatas decorated to look like softballs. The chocolate balls are on a wooden surface with red candy pieces scattered around. One egg is cracked open, revealing a hollow interior filled with colorful candies. A wooden mallet and a baseball glove are visible in the background.

    Instructions

    • Wash and dry the mold thoroughly. Place it on a stable surface like a silicone mat or a baking tray.
    • Melt the chocolate: Chop the chocolate into small pieces for even melting. Use a double boiler or microwave in 30-second intervals, stirring between each interval, until the chocolate is smooth and fully melted. Avoid overheating, as this can cause the chocolate to seize.
    • Create the chocolate shell: Pour a portion of the melted chocolate into the mold or over the balloon. Use a spatula or pastry brush to spread the chocolate evenly, ensuring full coverage. For a thicker shell, let the first layer set for 10-15 minutes in the refrigerator, then apply a second coat.
    • Mold the chocolate: Once the chocolate is evenly coated, place the mold or balloon in the refrigerator for 30-60 minutes, or until it hardens completely.
    • Release the chocolate: Gently flex the mold to release the hardened chocolate shell. Be patient to avoid cracks.
    • Fill the chocolate: Place your chosen fillings inside the chocolate shell. Avoid overfilling to prevent the piñata from breaking prematurely.
    • Seal the chocolate mold: Melt a small amount of chocolate to use as “glue.” Place the second half of the chocolate shell on top (if making a fully enclosed sphere) and seal the edges with the melted chocolate. Smooth the seam with a spatula for a polished look.
    • Decorate: Use additional melted chocolate to attach sprinkles, edible glitter, or decorative frosting.

    Serving

    Place the finished piñata on a cake stand or platter. Provide a wooden mallet or small hammer for guests to break it open.

    Substitutions

    You can make this recipe for a variety of different dietary preferences and needs:

    • Gluten free: This recipe is naturally gluten free
    • Dairy free: You can make this recipe dairy free by using dairy free chocolate melts.
    • Vegan: You can also make this recipe vegan by using vegan chocolate melts.

    Storing Prepared Chocolate Pinatas

    You can store prepared chocolate pinatas for several days at room temperature. You can also make chocolate piñatas up to 2-3 days in advance. Store them in a cool, dry place to prevent melting or condensation. Avoid refrigeration unless necessary, as it may cause the chocolate to bloom (develop a white, powdery coating).

    Tips

    • Work in a Cool Environment: Warm temperatures can make chocolate difficult to handle. Aim for a room temperature of 68-70°F.
    • Avoid Water Contact: Even a small amount of water can cause chocolate to seize. Dry all tools and surfaces thoroughly before use.
    • Experiment with Fillings: From gummy candies to dried fruits and nuts, the possibilities are endless. Tailor the fillings to match your event theme.
    • Practice Patience: Allow each chocolate layer to set completely before proceeding to avoid smudging or uneven thickness.

    FAQ

    Can I use real chocolate instead of compound chocolate (melts)?

    Yes, you can use real chocolate instead of compound chocolate (also known as chocolate melts). You can also substitute dairy free chocolate or vegan chocolate if needed.

    What should I do if my chocolate shell cracks?

    Don’t panic! Minor cracks can be patched with melted chocolate. For larger cracks, try re-melting the shell and starting over. Work gently when releasing the shell from the mold or balloon to minimize breakage.

    Can I use other shapes?

    Yes, chocolate molds come in various shapes, including hearts, stars, and even holiday-themed designs. You can also experiment with layering different chocolate colors for a marbled effect.

    What's the best way to break open a chocolate pinata?

    Provide a wooden mallet or small hammer. Tap firmly but gently on the chocolate surface.

    A baseball or softball themed candy-filled egg. It is also known as a chocolate pinata. The egg is cracked open, revealing a variety of candies inside, including Tootsie Rolls, Blow Pops, and Mike and Ike. A wooden mallet is lying next to the egg, along with a baseball glove. There are also some red and yellow candy pieces scattered around.

    DIY Chocolate Pinata

    Traci Wennerholm
    Creating a chocolate piñata is a fun project that’s sure to impress your guests. Whether you choose to make it entirely from scratch or use a chocolate mold kit, with a little creativity and care, your chocolate piñata will be the highlight of any celebration.
    No ratings yet
    Print Recipe Pin Recipe
    Prep Time 10 minutes mins
    30 minutes mins
    Total Time 40 minutes mins
    Course Dessert
    Cuisine American
    Calories 2300 kcal

    Equipment

    • chocolate mold
    • melting chocolate
    • spatula or brush optional

    Ingredients
      

    • 1-2 pounds melting chocolate milk, dark, or white chocolate based on preference
    • fillings for pinata small candies, chocolates, marshmallows, nuts, or mini toys.

    Instructions
     

    • Prep the Mold: Wash and dry the mold thoroughly. Place it on a stable surface, such as a silicone mat or baking tray.
    • Melt the Chocolate: Chop the chocolate into small pieces. Melt in a double boiler or microwave in short intervals, stirring well to prevent overheating.
    • Create the Chocolate Shell:
    • Pour melted chocolate into the mold or over the balloon.
    • Spread evenly using a spatula or brush.
    • For a thicker shell, let the first layer set in the refrigerator before adding a second coat.
    • Set the Chocolate: Place the mold or balloon in the refrigerator for 30-60 minutes, or until completely hardened.
    • Release the Chocolate: Gently flex the mold to release the shell.
    • Fill the Piñata: Fill the chocolate shell with your desired treats. Avoid overfilling.
    • Seal (if applicable): If creating a fully enclosed sphere, glue the two halves together using melted chocolate. Smooth the seam.
    • Decorate: Decorate with sprinkles, edible glitter, or frosting using melted chocolate as adhesive.

    Notes

    see notes on storing and substitutions in post

    Nutrition

    Calories: 2300kcalCarbohydrates: 274gProtein: 18gFat: 155gSaturated Fat: 91gPolyunsaturated Fat: 4gMonounsaturated Fat: 51gSodium: 73mgPotassium: 1315mgFiber: 25gSugar: 234gCalcium: 109mgIron: 13mg
    Keyword chocolate balls, chocolate egg cream, chocolate mold, chocolate pinata
    Tried this recipe?Let us know how it was!

    « 4 Ingredient Banana Bread with Self Rising Flour
    Copycat Polynesian Cultural Center Guava Cake »

    Reader Interactions

    Leave a Reply Cancel reply

    Your email address will not be published. Required fields are marked *

    Recipe Rating


    Primary Sidebar

    traci burntapple website featuring recipes with five ingredients or less

    Hi, I'm Traci! Cooking hasn't always come easy. I'm the burnt pancake on one side and perfect on the other pancake person that serves it to you with the pretty side up. I've learned to cook and make it look easy to my family and others. I'm now helping you save time & money with easy simple recipes with five ingredients or less!

    More about me →

    Popular

    • A top-down view of a single, shiny Cheddar's honey butter croissant on a round, white plate featuring black abstract floral and geometric designs. A partial croissant on a wooden board and a grey cloth napkin are visible at the edges, with white orchid flowers in the upper left corner.
      Copycat Cheddars Honey Butter Croissants
    • A mason jar filled with a Sonic-style Dirty Dr Pepper sits on a rustic white wooden surface. The drink is dark brown, filled with ice, and has visible carbonation bubbles on top. A fresh lime wedge is perched on the rim of the jar, while two additional limes, one whole and one sliced in half, rest nearby on the table. The background features a weathered wood texture, adding to the casual, homemade aesthetic.
      Copycat Sonic Dirty Dr Pepper
    • Top-down view of a white plate with a folded scrambled egg and avocado with salsa. The omelet is topped with slices of bright green avocado and a spoonful of chunky red salsa. A silver fork lies across the omelet. To the left of the plate is a folded white cloth napkin. In the upper right corner, a wooden cutting board holds half of a sliced avocado, a small pile of orange powder (possibly paprika), and a small pile of black peppercorns. A white bowl of red salsa is also on the cutting board. The scene is set on a light-colored marble countertop.
      Scrambled Eggs and Avocado with Salsa
    • A plate of folded breakfast scrambled eggs seasoned with pepper, served with sliced avocado, a sprinkle of orange powder (possibly paprika), and a side of red salsa.
      Breakfast Scrambled Eggs

    Footer

    ↑ back to top

    About

    • Privacy Policy

    Newsletter

    • Sign Up! for emails and updates

    Contact

    • Contact

    As an Amazon Associate I earn from qualifying purchases.

    Copyright © 2025 Burnt Apple

    Rate This Recipe

    Your vote:


    A rating is required
    A name is required
    An email is required