

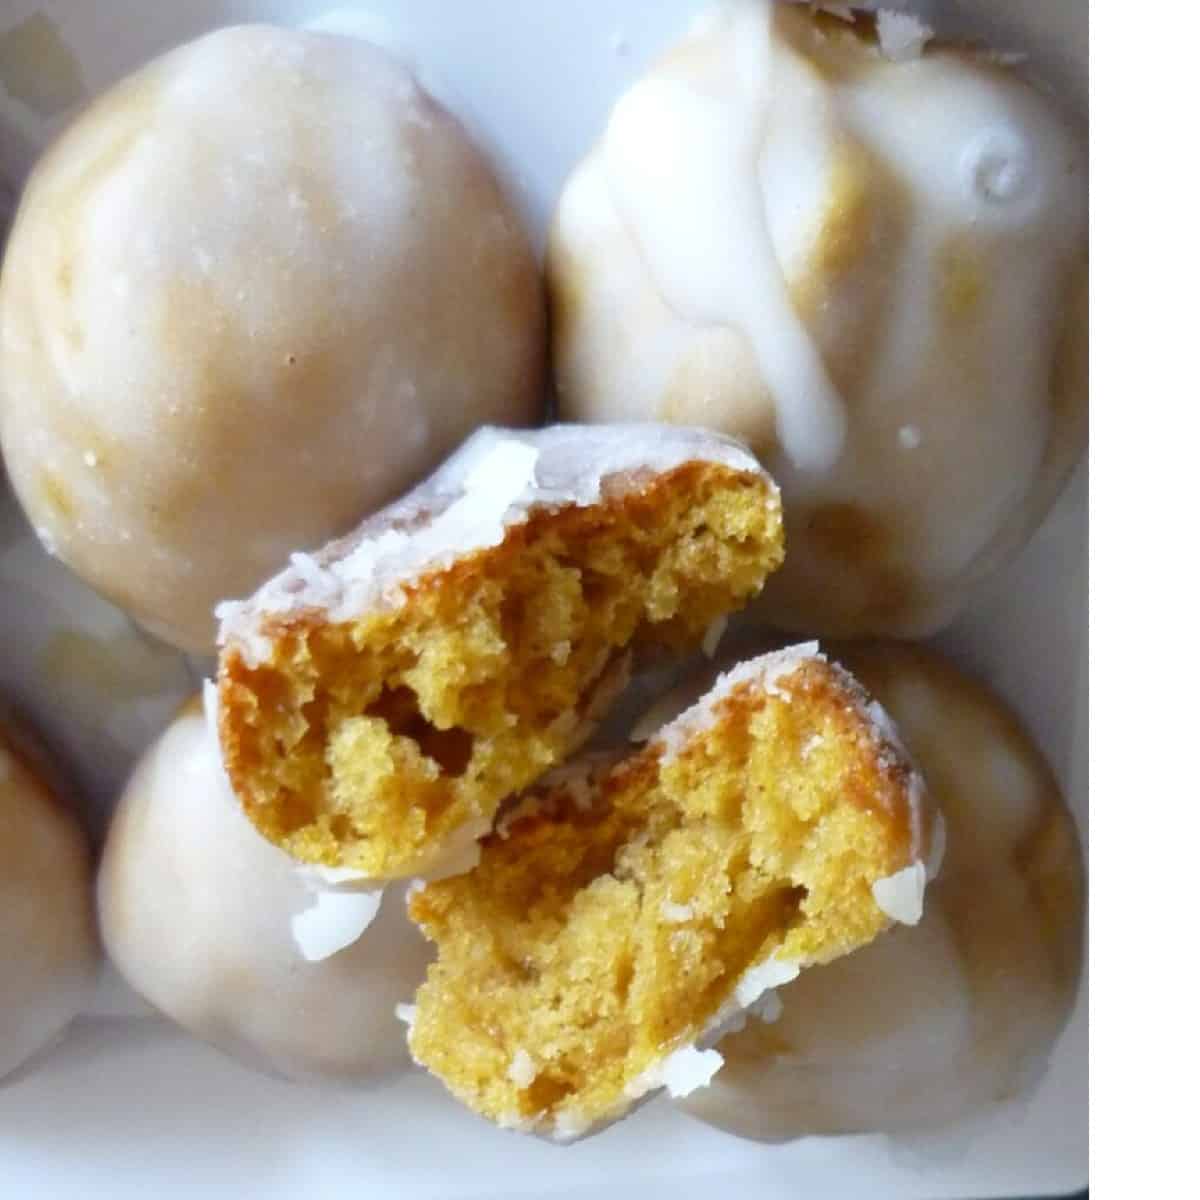
Make your autumns extra special with the taste of these warm and delicious baked pumpkin spice glazed donut holes! These pumpkin spice donut holes are easy to make, and all your family and friends will love these delicious treats.
Making Baked Pumpkin Spice Donut Holes
Baked pumpkin spice donut holes are a delicious and easy fall treat that are perfect for breakfast or as a sweet snack. These donut holes are made with pumpkin puree, pumpkin spice, and plenty of other spices to add flavor. The donut holes are then coated in a glaze made with powdered sugar and more pumpkin spice for an extra pumpkin-y kick.

Gather All of the Ingredients
Before you begin to bake the donut holes, be sure to gather all of the ingredients you need for the recipe. This includes cinnamon, nutmeg, baking powder, brown sugar, white sugar, butter, pumpkin puree, and eggs. You will also need all-purpose flour, milk and a dash of salt for best results! Once you’ve gathered your ingredients, preheat your oven to 350 degrees before mixing everything together to form your dough.
LOVE DONUTS? IT'S YOUR LUCKY DAY!! WE'VE GOT TONS OF DONUT RECIPES!!!
Preheat the Oven and Prepare The Muffin Tin
Once your dough is ready, it's time to prepare the mini muffin tin for baking. Grease your pan with a tablespoon of butter or non-stick cooking spray. Then, spoon 1 tablespoon of the dough into each mini muffin cup to form the donut holes. Place the tray in your preheated oven at 350 degrees and bake for around 8-10 minutes until golden brown. Be sure to keep an eye on them as they bake so that they don't overcook!
Mix Together the Batter
Begin by combining the dry ingredients together in one bowl until evenly dispersed. This includes flour, baking powder, salt, cinnamon, nutmeg and allspice. In another bowl whisk together the wet ingredients - eggs, sugar, milk, pumpkin puree and melted butter. Once combined add this mixture to the dry ingredients and mix with a rubber spatula until completely blended. It should form a dough-like consistency. If it is too sticky you can incorporate a little extra flour as needed.
Bake for 8-10 Minutes
Grease a donut hole pan and scoop the pumpkin spice dough into each cup, filling them only halfway. Place the tray in an oven preheated to 350F and bake for 8-10 minutes or until slightly golden. Lastly, remove from oven and carefully release the warm donut holes onto a cooling rack. Allow to cool slightly before glazing with your favorite icing. Enjoy!
Glaze and Enjoy!
Now comes the fun part: glazing! In a small bowl, combine 1 cup (125 g) confectioners’ sugar, milk and vanilla. Mix all ingredients until fully combined. Dip each donut hole into the glaze mixture until completely covered. Place the coated donut holes back onto the cooling rack to set before serving. Enjoy your irresistible Baked Pumpkin Spice Glazed Donut Holes!

Baked Pumpkin Spice Donut Holes
Equipment
- Mini Muffin Pan
Ingredients
- 1 ¾ cups white whole wheat whole wheat, or unbleached all purpose flour
- 2 teaspoons baking powder
- ½ teaspoon salt
- 1 teaspoon cinnamon
- ½ teaspoons nutmeg
- ½ teaspoon allspice or ginger
- ⅛ teaspoons ground cloves
- ⅓ cup applesauce
- ½ cup brown sugar
- 1 egg
- 1 teaspoon vanilla extract
- ¾ cup canned plain pumpkin
- ½ cup low-fat buttermilk soy, or other milk alternative
- PUMPKIN SPICE MUFFIN GLAZE
- 2 cups powdered sugar
- ¼ cup milk
- 1 teaspoon vanilla
Instructions
- Preheat the oven to 350 degrees. Lightly grease and flour a 24 cup mini muffin pan. Set aside for later use.
- In a mixing bowl, place your dry ingredients and mix them together until well blended.
- In a separate mixing bowl, whisk together the applesauce, egg, vanilla, and pumpkin. Whisk until mixture is well incorporated and smooth. Slowly add the dry ingredients to the wet ingredient mixture. Stir until just combined. Do not over stir!
- Place approximately 1 tablespoon of batter into each muffin cup. Bake for 8-10 minutes. Remove from oven, then wait 5 minutes for muffins to cool slightly. Remove muffins to cooling rack to finish cooling. Glaze once muffins have cooled.
- *Tip: Place parchment paper or aluminum foil under your cooling rack for quick and easy cleanup!
- In a saucepan, mix together the milk and powdered sugar over low-medium heat until mixture becomes warm. Slowly dip each donut hole into the glaze, turning until donut hole is completely covered in glaze. Remove donut hole with a slotted spoon, allowing excess glaze to drip back into the saucepan. Place glazed donut back on cooling rack to allow glaze to harden and excess to drip off. Continue glazing donuts until completed.
Kati
These look amazing!!! I love how you baked them in mini muffin pans and not fried....super smart!!
Valerie
These look so great! And I love that they are baked, not fried like my daughter's favorite donut holes.
Ruby
No yeast + no frying = bookmarking!
OishiiTreats
yum donuts and pumpkin, yes please!
Swedish Chef
These donut holes sound great. However, there is no mention of when to add the buttermilk within the recipe. I would assume you add the buttermilk with the other wet ingredients just before folding in the dry ingredients. Please leave a follow up as I am usually wrong with my assumptions.
Thanks.
healthydealsnsteals
Yes, you add the buttermilk in with the other wet ingredients. Sorry! 🙂
m
This is a great recipe!