

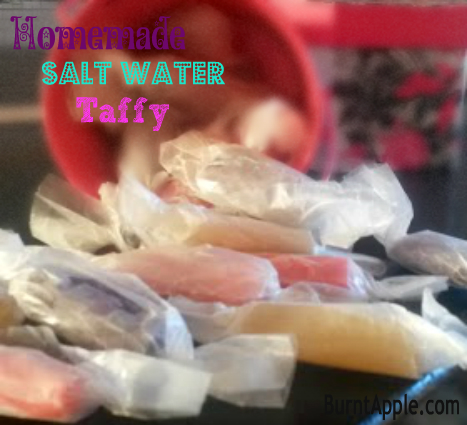
If you're looking for a sweet treat that's both nostalgic and delicious, try making old fashioned salt water taffy at home. This classic candy has been a favorite for generations, and with this recipe, you can recreate the flavors of the boardwalk in your own kitchen. Follow these simple steps to make a batch of taffy that's sure to please everyone!

Making Old Fashioned Salt Water Taffy
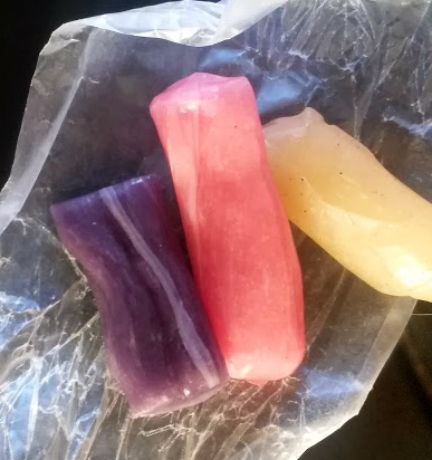
I made three kinds of taffy--cinnamon, peppermint and vanilla bean. The taffy I made was naturally flavored and contains organic corn syrup. I also used natural dyes instead of artificial dyes. This gave them a beautiful natural color!
It was a lot of fun taffy pulling. The kids got tired after awhile but did love enjoying eating the taffy they pulled.
Ingredients
You'll want to grab these ingredients for making your taffy:
- ⅛ cup butter, softened (2 tbsp)
- 1 cup organic or homemade corn syrup
- ¾ cup sugar
- 1 ½ teaspoon extract
- ¼ teaspoon salt
- Food Coloring
Gather Your Supplies
You also want to grab a candy thermometer, a large pot, a wooden spoon, a baking sheet, and wax paper. Make sure to measure out all your ingredients before you start cooking, as timing is crucial in candy making.
Get your taffy cooking!
Lightly grease one 8x8 inch pan and set aside. In a small saucepan, stir together the corn syrup and sugar over medium heat. Bring the mixture to a boil while stirring frequently. Add in the butter, continuing to stir frequently while mixture continues to boil. Continue cooking and stirring until candy thermometer reaches 255 degrees (between soft and hard ball stage). Remove mixture from heat, stir in the oils or extract, the salt and the food coloring.
Cook the sugar mixture to the right temperature
The key to making perfect salt water taffy is cooking the sugar mixture to the right temperature. Use a candy thermometer to monitor the temperature and make sure it reaches 255°F (124°C). This will ensure that the taffy is firm enough to hold its shape, but still soft and chewy. Be patient and don't rush the cooking process, as this can result in a sticky, gooey mess. Once the mixture reaches the right temperature, remove it from the heat and add your flavoring extract and food coloring.
Add flavoring and coloring to the mixture
Once the sugar mixture has reached the right temperature, it's time to add your flavoring extract and food coloring. You can use any flavoring extract you like, such as vanilla, peppermint, or fruit flavors. Add a few drops of food coloring to give your taffy a fun and vibrant color. Stir the mixture well to ensure that the flavoring and coloring are evenly distributed. Be careful not to over-stir, as this can cause the taffy to become tough and hard to chew.
How much flavoring should I use for homemade salt water taffy?
To Make Peppermint Taffy: Use 1 ½ teaspoon peppermint extract or drops of peppermint essential oils To Make Vanilla Bean: Use 2 teaspoon vanilla extract or 1 vanilla bean, scraped. To Make Cinnamon: Use 1 ½ teaspoon cinnamon extract or drops of cinnamon essential oil.
Pull the taffy until it's light and fluffy
There are a couple of ways that you can pull taffy. First you will want to pour the taffy into the 8x8 inch pan and allow it to set up for 5-10 minutes. Taffy is ready to begin pulling when it has cooled enough to comfortably handle it in your hands.
The two options for taffy pulling are:
- To pull taffy option #1: Place taffy in a lightly greased mixing bowl and allow to mix for 5-10 minutes on low (use the dough hook or paddle attachment but not the whisk). The taffy will begin to lighten in color.
- To pull taffy option #2: Divide the taffy in two parts. With lightly greased hands pull and stretch the taffy (approximately 15 minutes) until lightened in color. This can take anywhere from 10 to 20 minutes, depending on the humidity and temperature in your kitchen.
Once the taffy is light and fluffy, it's ready to be cut into bite-sized pieces and wrapped in wax paper.
Cut and wrap the taffy for storage or sharing
After all the pulling and folding, it's time to cut and wrap your salt water taffy. Use a sharp knife or kitchen scissors to cut the taffy into bite-sized pieces. You can also use a small cookie cutter to create fun shapes. Once cut, wrap each piece in wax paper to keep it fresh and prevent sticking. Store the wrapped taffy in an airtight container at room temperature for up to two weeks.
Questions about making homemade salt water taffy
Can I make salt water taffy without a candy thermometer?
It is possible to make salt water taffy without a candy thermometer, but it can be tricky to get the temperature just right. Without a thermometer, you will need to rely on visual cues to determine when the mixture is ready to be pulled. It's recommended to use a thermometer to ensure that your taffy turns out correctly.
Can I make salt water taffy without a stand mixer?
Yes, you can pull the taffy by hand if you don't have a stand mixer. However, pulling taffy by hand can be difficult and requires a lot of arm strength and endurance.
How long does it take to make salt water taffy?
The process of making salt water taffy can take about an hour from start to finish, including cooking and pulling the taffy.
How long does salt water taffy last?
Salt water taffy can be stored in an airtight container at room temperature for up to two weeks.
Can I freeze salt water taffy?
It is not recommended to freeze salt water taffy, as the moisture in the taffy can cause it to become sticky and lose its texture.
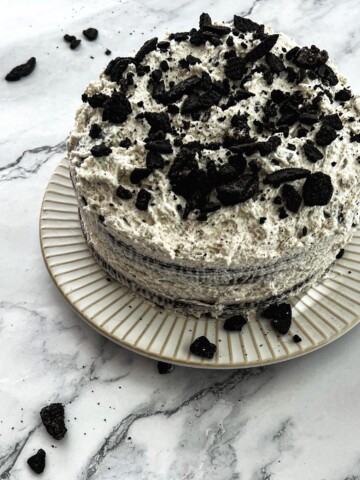
More Candy Recipes!
We have more homemade candy recipes on our website! Dragons beard candy is a fun taffy like candy that takes a little less time to make. Pixie sticks candy are another fun treat to make!
Saltwater Taffy Recipe
Equipment
- candy thermometer
- saucepan
- wooden spoon
Ingredients
- 2 tablespoons butter softened
- 1 cup organic or homemade corn syrup we used Wholly Wholesome
- ¾ cup sugar
- 1 ½ teaspoon extract see notes
- ¼ teaspoon salt
- Food Coloring
Instructions
- Lightly grease one 8x8 inch pan. Set aside.
- In a small saucepan, stir together the organic corn syrup and sugar over medium heat. Bring the mixture to a boil while stirring frequently. Add in the butter, continuing to stir frequently while mixture continues to boil. Continue cooking and stirring until candy thermometer reaches 225 degrees (between soft and hard ball stage). Remove mixture from heat, stir in the oils or extract, the salt and the food coloring.
- Pour the taffy into the 8x8 inch pan and allow to set up for 5-10 minutes. Taffy is ready to begin pulling when it has cooled enough to handle.
- To pull taffy option #1: Place taffy in a lightly greased mixing bowl and allow to mix for 5-6 minutes on low (use the dough hook or paddle attachment but not the whisk). The taffy will begin to lighten in color.
- To pull taffy option #2: Divide the taffy in two parts. With lightly greased hands pull and stretch the taffy (approximately 15 minutes) until lightened in color.
- Roll the taffy into a ½ inch wide rope. Cut taffy with scissors into one inch pieces and wrap in waxed paper.


Nancherrow
How fun! We love saltwater taffy, but have never tried making it. Thank you! Would love for you to share at Fridays Unfolded!
Alison
Nancherrow
Amy B
How many drops of essential oil would you use per recipe? We'd like to make the following flavors:
1) Anise
2) Lemon
3) Cinnamon (would you use cinnamon leaf or bark essential oil?)
4) Grapefruit
5) Vanilla
6) Orange
7) Ginger
8) Lime
9) Peppermint
10) Spearmint
11) Wintergreen
12) Tangerine
Thanks so much for any help you can lend! 🙂
burntapple
I would use a few drops (start with 3-4) for each of these and adjust for flavor if needed. The cinnamon I would use essential oil. Hope that helps!